13 Oct 2010

Material Continuation

Patch after patch I have created the majority of the material now. The hair has been particularly unusual, I thought the flat image would look unrealistic but it doesn't look too bad. It just looks like I didn't put wax in my hair that day...


I did realise that there are no eyeballs, this has just been put to the side. But now things are starting to look realistic, I decided to add this feature. Simply creating a sphere and applying a planar UVW Map modifier to reflect the planar layout of the source image, (flat from a front view), I placed this inside the entity and applied a smaller version of the original source image of myself (just the individual eye) and cloned this for the other eye, changing the material to the other eye, again for accuracy.
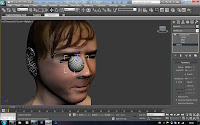
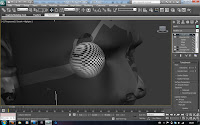

Foolishly, I did not save before the next step, so I did end up doing it again, but I attempted to attach the two spheres to the mesh. (Not weld, just attach, so they were a group). This resulted in the following:
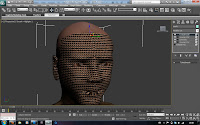


My texture was all but thrown out the window. From experience last year, I know you can spend absolutely hours fiddling with materials in MAX, and I really did not fancy that! It was easier to simply recreate the spheres and apply the ready-to-use materials.

Giving a touch of realism...

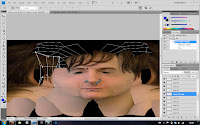
Progressing on with this organic modelling, I have now used Photoshop to create a texture map of the desired material (my face) to be attached to the mesh to create a realistic looking digital version of me.

After rendering the required guide, Photoshop was used to create the material for the mesh.


This was a good guide, especially now there were no overlapping or inverted faces. The only problem I had was when areas like the lips had so many edges bunched together, it was hard to distinguish where the certain features were meant to be placed.


I found it a lot easier to go ahead and apply the texture in a PSD format with collapsed layers to the mesh and keep 3ds max open and showing the 3d representation of what was going on as I adjusted the Photoshop file. It made it easier to see it visually, rather than try to imagine it.


Adding patches of the source photos was a timely procedure but gave effective results. The warp tool was especially helpful for moulding the patches into place within the mesh.


More and more patches were applied and progress was consistently reviewed in MAX.

12 Oct 2010

Lips, Eyes & Redoing the UVW Mapping

I have had to redo the UVW Map stage completely, as I forgot a part of the topology!

Having not adjusted the eyes and created lips at all, I had to jump back down to the editable poly stage, which mucked up the textures.

Holding shift and dragging edges allowed lips to be made, and I also adjusted the eyes to be able to support eyeballs. It now looks more realistic, (from close-range).

Doing the UVW Unwrap a second time, I found that things went a lot more smoothly. Once again creating a cylindrical plane for the head, relaxing the faces of the head seperately from the ear gave more flexibility in the use of UVW editing.


The second time round, for no apparent reason the pelt modifier seemed to work properly and properly commit after closing the modifier, as shown below. I also fixed ALL inverted and overlapping faces, much to my surprise.


It was more difficult to weld the two halves together this time though, the vertices were farther apart and had more of an arc in shape. This was no real problem, just time consuming.


So after a foolish mistake, and a bit more time spent, I now have a mesh with lips and suitable eyes with correct material layouts. Yey!

Materials (UVW Mapping)

I struggled greatly with materials last year and was extremely apprehensive with this stage of the head creation. This method though was much better and more detailed, and (eventually) sucessful.

To begin, selecting the faces of the head in an UNWRAP UVW modifier and relaxing this produced nice results. I will be honest, when doing this section, I did run into problems of having inverted faces and overlapping faces that I did ignore, but this was fixed later on. The ear was of a different scale, and so looked different.


Identifying a seam allowed the ear to be mapped with the PELT modifier. Again, naughtily I ignored the fact that the pelt did not work, because as you can see in the screens below it looks as if it is from the side view rather than being unwrapped.


I continued with the tutorial and welded the mirrored maps together, all ready for the next step.

10 Oct 2010

Attaching The Ears

Now for another problem; when unhiding my head, the ears are positioned inside the head. This is because when creating the head, there was a lot of guess work involved because of the volume of my hair. To solve this, I simply moved the vertices surrounding the ear inwards to create a small cavity for the ear.


Once in place, to attach the ear, firstly a back had to be created to make the ear 3 dimensional. Holding shift and dragging edges inwards allowed a quick and easy back to be produced, and after matching up the number of edges for ataching the two entities together (easier than I thought!)


Once happy with the cavity around the ear, the back of the ear and the edges, I simply created polygons to attach the two entities to make them one.


Now when I did this the first time, as shown below somewhere along the line the symmetry modifier was lost. This resulted in the opposite ear not being created.

Rather than have to do all the work again (UNDO was not available to that point) I tried to look at the entity and see what was wrong.


It seemed there were miscellaneous vertices in the environment that were not part of the actual entity (messy work on my part). These were found and removed at a later stage, but I could not identify them for some reason at this point. Nevertheless, I tried to apply the symmetry modifier after attaching the ear, which theoretically would produce the desired results. (Image on left).


After revealing that it would not, I went back to a file before the ear attachment and reattached it in the same fashion keeping an eye on the symmetry modifier (right image). This shows the final head after this was successful.

Modelling; Part 5

Now I have completed the hardest part of the modelling so far in my opinion; the ear. THANK GOD for the mirror tool so I don't have to go through that again!


I spent more time on the ear than for the whole head, neck and shoulders, by quite a substantial amount. This was very surprising, I did not realise the complexity of this part of the anatomy.


Here is the final ear. I played with it for hours but have decided that I cannot do any more to it, I will move on.